Monday, September 19, 2011

My macs became a platter of "Dolly Partons"

I always hear this old saying; “ Don’t judge a book by its cover.” Look at these macarons of mine. Do you think they are pretty? When I brought them with me to a Hari Raya lunch which hosted by one of my girlfriends, I received a lot of oohs and aahs from her and the other guests. 


They did not know that my macarons had a flaw on the surface. Did you notice the little flower design on them? You likely did, as it is uncommon to see macarons decorated like that. So I won't keep you guessing. The decorations are to hide a small flaw in the confection's shape. Somehow, my baked little gems had developed "nipples", meaning a raised feature in the middle on top of all of them. I believe they turned out this way because I underfolded the batter. When I tasted them, the texture was perfect, a little crispy on the skin and soft and chewy on the inside, exactly the way I like it. I showed the macarons to my Quay lo. His first response was that I should use some red food colouring and "rouge" in the unwanted feature. After regaining my composure, I explained that might be ok for him but hardly suitable for a luncheon with my lady friends in celebration of a religious holiday. A platter of "Dolly Partons" just would not do.

Since they were delicious, at least by my own estimation, I thought it was worth hiding the flaw. I piped the little flower on to each of them. Bless my lady friends, they were all duly impressed, and I was duly relieved, while my husband was still at home laughing his head off.

This experience made me think of how outside flaws can sometimes be covered up easily and sometimes not. Have you come across someone who looks attractive and beautiful but as you get to know the person better, you find out that the true character is so ugly that it goes to the bone? Or the reverse, that there are also people who may appear unattractive outwardly, but inwardly they are a gem?
When we look for a soul mate, don’t we all wish we could get someone who is beautiful inside and outside? However, if we are given a choice, which would we prefer? Remember, our ideas of outward beauty seem to change with the times, and the latest fashions, or the latest "look", as popular culture tends to tell us what to think. Too many of us fall prey to those ideas. Quay lo always rants about high heels. He thinks the women of the world have been sold a form of self-torture. I think he may have something there.

In the case of my food and bakes, I would prefer the taste to be right and if they don’t look good, I will find ways to cover up the flaws where I can, and serve anyway if I cannot. But if the taste is not right, there is no way to salvage and one must simply start over.

Oh, and in one respect the same is true of me. I cover up my outside flaws with "war paint", but as for my inside flaws, I must work very hard to get rid of and I hope I will always know them and work on them. Thank goodness I am not a tray of cookies. And thank goodness that my Quay Lo loves me for who I am, flaws and all. And I love him, even though he keeps asking me to recreate those "Dolly Partons".

Okay, I said I will share with you what I learned from the demo of “How to make macarons” by Chef Frederic Oger from Academy of Pastry Arts. He pointed out few important points:

When to stop whipping the egg white. Notice the peak with a hook? That's when you stop.
When to stop folding the batter. Stop folding when the batter slowly flatten

Get to know the behavior of your oven to determine the temperature and the time required.

Lastly, don't forget to tap the base of the baking sheet to flatten the batter before letting it to dry out for at least 30 minutes or more. They should be ready to go into the oven as soon as  it does not stick to your finger when you gently touch it.

Macaron Chocolate
Recipe from Academy Art of Pastry, Malaysia


Chocolate Praline
Recipe from Academy Art of Pastry, Malaysia

The correct way of piping out the batter


How to make a piping bag from parchment paper


It was a great demo and we get to eat lots of wonderful pastry. Here are all the goodies displayed in the Academy which is truly a feast for the eyes.
All kinds of breads
 These are the cakes on display
 The Mac fever
Look at all these breath taking pastries!


Work of Art - Chocholate sculptures

I would like to thank Academy of Pastry Art Malaysia for inviting me to attend the demo. It was a wonderful experience and I learned a lot about making macarons. It was an eye opening to see so many breath taking and artful bakes! AWESOME!!

After attending the demo, I took heed of all the advice given by Chef Frederic and here is my 3rd batch of Macarons. I must say, I have them perfect, both look and texture! I just need to practise more on my piping and I would say I have conquered the intimidation of making macs! WOOHOO!! I got positive feedback from 5 of my friends whom I get them to taste my macarons and I can't tell you how thrill I am. LOL!


Friday, September 16, 2011

The only way to have a friend is to be one - Ralph Waldo Emerson

If you were to ask me one year ago if we can make friends through blogging, I would probably said, quite unlikely. Today, I have a totally different opinion because after just one year of blogging, I have made many friends, some I have met and some I have not. All my blogger friends and readers are very supportive. They not only leave encouraging comments often, they also share their knowledge and offer advice without expecting anything in return. Isn't that amazing? For example, when I made mistakes in my recipe, I was not criticized but instead they take time to alert me about my error in a very polite manner. Two blogger friends who take time to do that are Wendy of A Table for two or more and Elisabeth of food and thrift. I really appreciate it. Thanks again Wendy and Elisabeth. Then, I have LeQuan of love to eat, who always take time from her busy schedule to read almost all my posts and leave comments which always put a smile on my face.  Diane from My life in Charante too visits my blog often and I was so happy to receive a postcard from her sometime ago. Not forgetting David of Alokoli, he is a sweetheart, always leave kind words on my post. He is an amazing writer.  I love all him poems, always strike one of my nerves. Another great blogger friend is Sonia of Nasi Lemak Lover. Whenever she goes on holiday, she will bring back goodies from abroad to share with us. She has given me a bottle premium fish sauce from her Vietnam trip and Shanghai noodles from her Shanghai trip.  How thoughtful is that? Oh another blogger friend, Pei-Lin of Dodol Mochi who is a busy bee but it was so nice of her to spend a weekend with me, to teach me how to make macarons.  Swee San of Sweetspot is a talented and generous baker. She had shared with us so many of her wonderful bakes. Last month, we had a gathering at the Chillis in Empire, I managed to catch up with Reese of Reese Kicthen and also Ann of Pigpigscorner. We had a great time together and we got to see Wendy's new born! He is such a cutie! 


Just yesterday, I received a package from a blogger friend Joelyn.  She posted a photo of her and her girlfriend on facebook. I noticed the beautiful scarf around her neck and I complimented her. Guess what? The next moment, she messaged me and said she is going to send me the similar scarf because she had bought two!  Isn’t she sweet?  Then when the packaged arrived yesterday, I was surprised with two more gifts. A box of fragrant soaps and a nice looking shopping bag! 


Hey Joelyn, I love them all and I can’t wait to wear the lovely scarf. The shopping bag is so handy to go shopping with and the soaps smells good. Many thanks, I am touched by your thoughtfulness.

I love all my friends and I would love to maintain our friendships for life. I hate to loose a friend for what ever reason. Here are some guidelines I used to help me to be a better friend to my friends:-

I must always remind myself not to ever judge my friends’ choices. I should trust that their wisdom will guide them through their life not mine.

I will always respect my friends’ decision even if I think it may be wrong and let them know I will be there when they need me.


I will never do anything out of guilt for my friends. Whatever I do for them is always from my heart and if there is something I can't do for them, I will be truthful and tell them even if I have to disappoint them.

I will never trash talk about one friend to the other. I will speak my mind directly with them if I think they treated me unfairly. Good friends are those who will speak the truth even when the truth hurts sometimes.

I will always try to be there to share big moments, sad moments as well as stupid moments with my friends. 

Here is to our friendships! Have a healthy, refreshing, colorful and delicious salad, just like how friendships should be!

Couscous Salad


Ingredients:
(A)
2 cups vegetable stock
2 tbs butter
2 cups instant couscous
50g rocket
¼ tsp ground black pepper
½ tsp paprika
(B)
1/2 tsp lemon juice
2 tbs fresh parsley
3 tbs softened butter
¼ red capsicum, diced
¼ orange capsicum diced
¼ green capsicum diced
½ cucumber, removed seeds, diced
50g feta cheese , cubed
1 small purple onion, thinly sliced in rings

Method:
In a medium saucepan, bring the chicken stock and butter to a boil over medium heat. Gradually, stir in the couscous. Remove from heat, cover and set aside to steam for 5 minutes. Fluff with a fork. Place rocket in a serving plate. Add (B) to cooked couscous and mix well. Sprinkle ground black pepper and paprika. 

Wednesday, September 14, 2011

Where is the birthday cake and the moon cakes?

Sorry no birthday cake. In my last post I ended with a photo of a candle on a macaron.  That was what I gave to my step brother, Vic on his birthday. Where is the birthday cake? Good question! Vic’s favorite cake is baked cheese cake so that was the first thing I did when I came home after attending the Demo on making Macs. (I will share with you in my next post.)  I could not find the recipe that I have used before so I found a new one at allrecipes.com  It looks easy and I followed it to the tee.  The result was disappointing! I do not think it is the recipe. I think it is my oven misbehaving. Guess what, my cheese cake had a burnt top before it is cooked.


So now what? Sometimes, when you are a desperado, you could come up with some clever ideas. Haha, I’ve some macarons in my fridge so I decided to let Vic blow the candle on a mac instead. I got to be creative when I have no birthday cake at the last minute. It worked out fine. hehe.

The three of us, me, my mum and my Quay Lo, each made a dish for Vic’s birthday dinner. My mum made no fish paste yong tau foo, my Quay Lo made Kurma prawns and I stir fried some butter garlic shimeji mushrooms and asparagus.


I think Vic enjoyed himself and was pleased with what we have installed for him.  Before he called it a night, I gave his a personal moon cake in a grand packaging. His favorite is the tradition lotus paste with egg yolk. 


Actually that was the the birds nest box. Yes, double boiled bird nest with red dates and rock sugar was the dessert for the evening. It has been quite a while since I had bird nest and it was delicious. Oooo but cannot eat so often, too expensive lah! 


After a wonderful time spent together, it is time to go home for Vic and Jeanie. As I send them to the door, I handed him another box of moon cakes to bring home to my nephews and niece. 
Then after half an hour, I received a phone call from my Jeanie. She said, “Yee Ku (2nd sister-in-law), when I reached home, your nephew Calvin saw his dad’s personal moon cake and he asked which shop offered such an elaborate moon cake packaging? I told him it is from Quay Po Cooks. Then, when he checked out the BIG box of moon cakes you gave them, he said, why these moon cake box so light?” Before she went further, I already burst our laughing. OMG!  When he opened each and every little box, there is no moon cake inside!!  Then I realized, I have given them the wrong box, the one that I am supposed to throw away! I laughed SO HARD until all my intestines were twisted. What a way to end a happy night!! When I told my Quay Lo what happened, he shook his head but I knew what that means. “She is LUCY again!” Can you imagine if I have given that box with no moon cakes inside to one of his clients? OOOO EMBARRASSED!! I think next time, when he asked me to arrange anything for his clients, I better tell him this, “Don’t count on Lucy, Honey.” LOL!

Of the three dishes above, I think I will share my mum’s recipe with you first. Once my Quay Lo gives me the recipe for his korma prawns, I will post it. His version of korma prawns tasted a little Indian and a little "Mat Salleh". The flavor was unforgettable.


No fish paste Yong Tau Foo 


Ingredients:
12 small shitake mushroom, soaked and squeezed dry
2 red capsicum, cut into small pieces
3 pcs tau foo, cut into half and sliced 3/4 through the center

2 tbs sunflower oil
2 tsp chopped garlic
oil for frying the stuffed mushrooms, capsicum and tau foo
1/4 c chopped spring onion for garnishing

Method:
Heat oil in wok and fry all the stuffed mushrooms, capsicum and tau foo till filling is cooked and set aside. Heat 2 tbs sunflower oil and put in the chopped garlic and stir fry till fragrant. Pour in the mixture of sauce and let it simmer till thicken. Return all  the stuffed mushrooms, capsicum and tau foo in the work and coat them properly with the sauce and garnish with spring onion and serve. 


Ingredients for the fillings:
300gm minced pork
2 florets wood ear soaked and chopped
3 medium shitake mushrooms, soaked, squeezed dry and chopped
3 stalks celery, chopped
1 egg
3 tsp corn starch
1 tsp ground white pepper
2 tsp maggie chicken stock 


Method: 
Mixed all the above throughly and let it marinate for 30 mins.


Ingredients for the sauce:
2 tbs oyster sauce
2 tbs hoi sin sauce
4 tbs water
2 tbs sugar
1 tbs sesame oil


Method:
Mix all the above and set aside for later use.


Thursday, September 8, 2011

Gnocchi knew me in 2006 but it's only now that we became friends

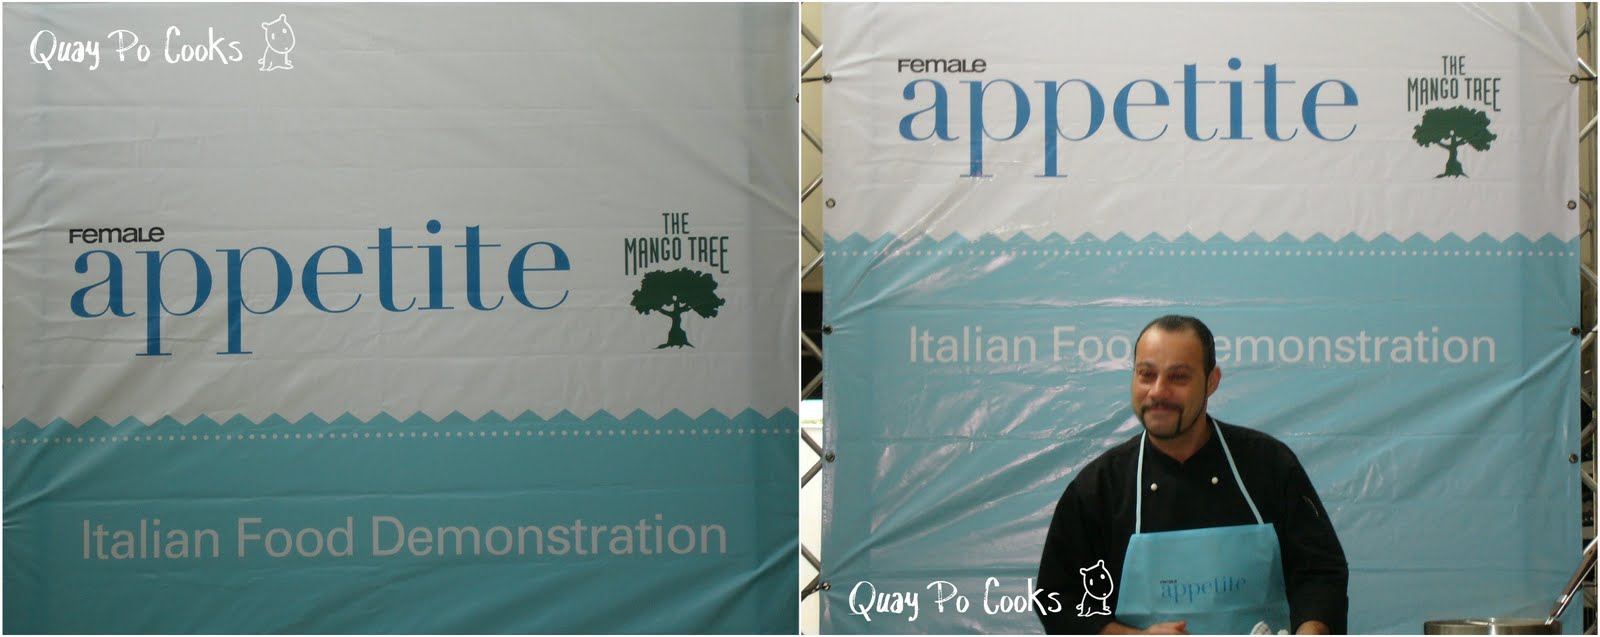
The first time I saw how gnocchi was made was when I went to a cooking demo with my girlfriend ,Kam at an Italian Food Demonstration in 2006 at an Italian Restaurant in Bangsar called The Mango Tree. The chef is a friend of ours. This restaurant no longer exist. The chef and his family has moved to Ipoh. 


After the demonstration I never followed up and made any gnocchi at home. That is because back then, I was really not interested in cooking at all.  To be honest, I was not a big fan of gnocchi but after I tasted the gnocchi from this recipe that I am about to share with you, I would say I could even have a craving for it.

It has now become a trademark dish for me. So I will share with you this wonderful recipe of spinach ricotta gnocchi with gorgonzola sauce. I urge you to try it because the delightful smooth texture of gnocchi, with the  edgy flavor of the creamy sauce, is insanely pleasing to the palette.  I poured myself and my Quay Lo a glass of white wine each and we enjoyed the meal. We both said at the same time after our bite of the last piece of gnocchi on our plates… Aaah…DIVINE!

Largely adapted from simplyrecipe.com

 Making the gnocchi


This recipe was featured in Asian Food Channel (Official) Facebook page on 5th September 2012

Ingredients for Gnocchi:
3 ounces fresh or frozen spinach
1 egg
2 tsp salt
1 1/2 pounds whole milk ricotta cheese, drained of excess moisture
1/3 cup finely grated Parmigiano-Reggiano cheese
1 3/4 cups all-purpose flour
Pinch of nutmeg

Method: 
1 Fill a medium saucepan halfway with water and heat until bubbles just begin to form. Add spinach and cook until tender, about 1 minute. Drain. Let spinach cool enough to touch, then squeeze as much moisture as you can out of it. You can also use a potato ricer if you have one to squeeze the excess water out of the spinach.

2 Add the spinach, egg, salt, and half of the ricotta to a food processor. Pulse until completely blended. Transfer mixture to a large bowl, mix in the remaining ricotta and the Parmesan cheese. Stir a pinch of nutmeg into the flour. Add the flour in by hand, starting with a half of the flour. Mix everything with your hands until the mixture holds together as a pliable dough.

3 Put the dough out on a lightly floured smooth, clean surface. Knead gently for about a minute, adding additional flour if needed, if the dough is too sticky. (At this point, if you wrap the dough in plastic and refrigerate for an hour, it will be easier to roll out.) When the dough is smooth and pliable, and still just a little bit sticky, divide it into 4 portions, each the size of an orange.

4 Flour your hands lightly. Using both hands, and a light touch, roll the dough out with a back and forth motion, starting at the center and stretching the dough out, to form a roll. This is the tricky part. You don't want to put so much pressure so that you compress the dough, but you do need enough pressure to create a rope of dough. The trick is to stretch the dough sideways as you are rolling. Once the segment you are working on gets to be about a foot long, you may find it easier to cut it in half, and then start working on each separately.

Roll the dough out until the roll is about the size of a middle finger. (Note that if your hands or the board is a little too floured, you may not have enough traction between your skin and the dough to easily stretch it sideways.) Cut each roll into 1-inch pieces.

5 Hold a fork at a 45% angle with its tines facing down on the work board, the curved part of the fork facing away from you. Starting with the curved outside bottom of the fork, press each piece of dough up along the length of the tines. Let the gnocchi fall back down. This is a pretty quick motion, the result is an indentation of the fork tines on one side of the gnocchi, and an indentation of your fingertip on the other side.
Place the gnocchi on a lightly floured cookie sheet. At this point they can be cooked, or kept in the refrigerator several hours or even overnight for prep minded chefs.

6 To cook the gnocchi, fill a large wide pot half-way with water. Bring to a boil, add 1 teaspoon of salt for every quart of water. Once the salt has dissolved, gently drop the gnocchi in the water, one by one. Try to do this in a way that the gnocchi are not falling in on top of each other, but rest on the bottom of the pan in a single layer. As the gnocchi cooks, they will rise to the surface of the water after a couple minutes. Use a slotted spoon to remove the risen gnocchi from the pot, place in a serving bowl. Sometimes the gnocchi can stick a little at the bottom. If you suspect this, nudge them a little to unstick them. As you remove some gnocchi, you can add a few more to the pan.

Gorgonzola Sauce


Ingredients:
½ C whipping cream
100gms gorgonzola cheese, cut into cubes
¼ C chives, chopped
¼ tsp ground black pepper

Method:
Bring cream to near boil. Add cheese a bit at a time while stirring until well blended. Pour over gnocchi and finish with black ground pepper and chives.

You can serve your gnocchi with a meat chop of your choice, such as a small beef steak, or chicken, or as the "primo" course in a full multi course Italian meal. I have served it with a fried chicken chop and garnished with truffle balsamic in these pictures.

Sunday, September 4, 2011

My son loves her so I would too

There are many stories about how mothers-in-law and daughters-in-law could not get along. I have seen the scene below in real life when I was 12 years old. Just a few steps away from our home, the two ladies quarreled all the time. They literally fought. I heard them using the most terrible words to swear at each other. I even saw them punch each other and in the end the one that got the punched the most was the man (the son/husband)! Poor guy!! What a life.


I had no experience being a daughter-in-law since both my mothers-in-law had passed away when I got married with both my husbands, nor do I know what it is like to be a mother-in-law since my son is not married. However, I know I will never want to be a monster-in-law. LOL!  I would wish to be a mother-in-law who will be missed when I am gone.


Mothers are by nature very protective of their children so we may often make the mistake of being too interfering and sometimes we are not even aware of it. That starts early in our kids lives and just never seems to go away in some folks.


Yes, I can be guilty of that too but fortunately, I have my Quay Lo to put me back on track. I would always want a good relationship with my son's girlfriend or his wife.  I guess the key to that is “Respect” for each other.


I have read an article long time ago about some tips on how to get along well with your daughter-in-law. Let me share with you those points that I could remember:

1)  If you have advice for your daughter-in-law , say it directly to her in a caring, and uncritical way. Be sure not to say it through your son. If you choose to speak up, mince your words before you open your mouth, if you can't do that, then just mind your own business and keep quiet. Never ever broach this subject as a reaction to something you have seen. Wait for a calm moment, with just you and her, and choose helpful words.
    
2) Do not drop in their home unannounced. Always check first and visit at a time that is convenient for them. 

    If they say they are not free to see you do not get upset. Be flexible, there is always another time.

3) Do not compete with your daughter-in-law to get “alone time” with your grand children. Let her decide what is the most convenient time you can be with them. She is their mother not you.

4) If you want to provide input on important decisions or issues affecting your grandchildren, discuss with both your son and your daughter-in-law about your concern and be proactive instead of complaining or nagging. However, be sure to listen to your daughter-in-law’s ideas first before offering your own. Then, you can express your own as opinions, never as demands.

Any mothers-in-law out there?  What do you think about the above tips? Do you say, "Ya, that will help." or "CRAP! I am the mother-in-law, she has to listen to me".

If there is daugther-in-law reading this post, what kind of mother-in-law do you wish to have?
You might be wondering why this crazy Quay Po suddenly talk about this subject right?  Well, actually what triggered the above thought was these wonderful tambun biscuits from Melaka. I was sitting in the kitchen alone this morning eating a piece and sipping my tea and the thoughts just came to me. Probably because the box of biscuits was given to me by my son’s girlfriend. She is a sweetheart.

For my Malaysian friends and readers, I highly recommend you to get a box of these biscuits if you happen to be in Melaka. They are by far the best tambun biscuits I have ever tasted. They are very flaky outside and the lotus paste filling was not so sweet like those with "tau sar" filling that I have tried before. I love it!


I am sorry, I don’t have a recipe to share today. I promise my next post will not be out of context and it will be all about food together with a recipe. Till my next post, enjoy your weekend. HUGS to all the in-laws! 

Thursday, September 1, 2011

OUR 'MACA-RIGHTS" YAY!!!

We had a blogger friend, Pei Lin of Dodol Mochi come to spend the first day of Hari Raya with us this year.  If you have been my readers, you will know, I have tried to make French macarons some time ago but FAILED mercilessly!! Instead of getting macarons, I got a batch of ugly flat MACA-WRONGS! LOL!  I had to scrape them out from the parchment paper to eat them.  Oh yes, I ate them all by myself, over a few days because I find it very hard to throw away food. Honestly, the taste was good but no one would believe that looking at them.  So, to cut the long story short, I asked Pei Lin to teach me the right method. She came on Hari Raya eve and stayed the night at my house. Early next morning, after we both had our coffee, we started with our baking adventure. I am sure both Pei Lin and I will never forget how we, like little girls, squatting in front of the oven waiting anxiously for the macarons to grow legs, and then both screaming and laughing so hard when they did! LOL!  It was a fun and joyful ride for us. OMG!! I can't believe our macarons got their LEGS and tasted AWESOME!! YIPPEE!!

Pei Lin, being a perfectionist, was not extremely happy with the result because she thought they didn’t look as pretty as she would have wished. For me? Hahaha, I was estatic!! The fact that the macarons have legs and could be lifted off the parchment paper easily, had already sent me to the moon! Furthermore, they tasted perfect with the roasted chestnut filling. I truly cannot ask for more, can I? To tell you the truth, I am feeling VERY excited even now while writing this post. I can’t wait to do this on my own with a different flavor of fillings.

Just curious: Do you spend a lot of time “perfecting” your work, so everything comes out the way you want it to?  You know, in my opinion, being a perfectionist has its pros and cons . One of the pros is, we set high bars for ourselves and try our best to achieve it, which is good. On the flip side, one of the biggest negatives is that it can prevent us from having fun and being happy more easily. Let me hear your views. Do you kick yourself or are you quick to say "good enough":-)


A big THANK YOU to Pei Lin for all the goodies she brought us (German chocolate cake, American macarons and the moon cakes her aunt baked). Delicious!  MUAX!!!  Don't forget our next project is making pasta together. Does anyone want to join us?


This recipe was featured in Asian Food Channel Official Facebook Page
on 3rd November 2013


Vanilla Macarons shells
Make about 15 to 16, 1 1/2 inches diameter shells

Ingredients
83 grams icing sugar
64 grams ground almonds
53 grams egg whites (about 2 small eggs), aged for 48 hrs at room temperature
28 grams granulated sugar
coloring
½ tsp vanilla extract

Method to make the shells:

Sift almond flour and icing sugar into a mixing bowl and set aside. Please ensure the mixture is dry is entirely dry. After it is well mixed, add in coloring and blend in.

In a large clean, dry bowl whip egg whites on medium speed until foamy. Increase the speed to high and gradually add granulated sugar. Continue to whip to  ALMOST stiff peaks like in the photo.

With a flexible spatula, gently fold in almond and icing sugar mixture into egg whites until completely incorporated. The mixture should be shiny and 'flow like magma.' When small peaks dissolve to a flat surface, stop mixing.

Fit a piping bag with a 3/8-inch (1 cm) round tip. Pipe the batter onto the baking sheets and try to have equal size circles. If you want to have uniform size of shells, drawn circles before you pipe.  Tap the underside of the baking sheet to remove air bubbles. Let dry at room temperature for 1 or 2 hours to allow skins to form or when you gently touch the top of the batter, it does not stick to your finger.

Bake, in a 210°C oven for 2 minutes. Then reduce the temperature to 150°C and baked another 10 to 13 minutes.

Remove macarons from oven and transfer parchment to a cooling rack. When cool, slide a metal offset spatula or pairing knife underneath the macaron to remove from parchment.

Ingredients for  Roasted Chestnut rum fillings:

50 grams roasted chestnut , puree
½ tsp milk
50 grams butter at room temperature
rum to taste

Method to make the filling:
Puree the roasted chestnut, butter and milk till smooth. Add in rum according to your taste.
(I added no sugar and the balance was perfect. Even my sweet toothed "lo kung" thought so. Nevertheless, some of you may want to add sugar to taste in the above.)

Assembling the macarons:
Pair macarons of similar size, and pipe about 1/2 tsp of the filling onto one of the macarons. Sandwich macarons, and refrigerate for one day to allow flavors to blend together. Bring back to room temperature before serving.


Advice from Pei Lin
1) It is important to let the egg white out in room temperature to age for 48 hours
2) Make sure when you beat the egg white it is NEAR stiff peak and not STIFF peak. This take practice to know what is near stiff peak. One way to know is that the peak form is like a small hook.
3) Remember not to over fold or under fold the batter.
4) Remember to let the batter dry for 1 to 2 hours before sending them for baking. This will prevent the shell from breaking and also to get a higher legs.
5) Don't forget to reduce the temperature to 150°C from 210°C after 2 mins.
6) When doing the piping, stop in the center so that the macaron shells will be balance in shape.
She said different people follow a different method and it is best to try a few and use the one that suits you best.