Tuesday, November 29, 2011

Those who hate, hurt the most

I was home alone for four days last week. My Quay Lo was on a business trip and my mum has gone to help her friend's daughter out. She went there to cook for her confinement and to look after her new born baby. When no one is in the house it will be the best time to make bread for there will be no distraction. Before I started to making my buns, I texted my Quay Lo and told him and this was what he replied me, "Got it Honey, no phone calls and sms:D"


When I was kneading the dough my eyes suddenly welled up with tears.  The thought of my late brother-in-law, Eric came to my mind. Eric was always there for me after his brother, my first late husband passed way 10 years before him. I am not sure why the making of the buns triggered the thought of Eric and the sadness in me. All I knew was I miss him very much. How I wish he is still here so that when my buns were baked, we could eat the buns together with local "kopi-o kow" (strong coffee) and “talk three talk four” (literally means talk about everything in the world) like we used to.  As buddies, we had gone through a lot together, good times and bad. There were times that we got very mad at each other but that had never been serious enough to break up our friendship (we were best of buddies for 27 years till the time he left us).  He may be gone but he will never be forgotten. There is always a special place in my heart for him. 

Have you ever ended any friendship before? Sad to say, I have. There were a few people whom I will never want to be friends with again. I did not like this a bit because I always believe in keeping friends and not loose them.  But then, how can you be friends with people who betrayed you after you have gone all out to help them? Being ungrateful is bad enough but betrayal? I can never get pass that.  I guess I am just human and not a saint. It is very hurtful when someone you regard as close friend betrays you. It was a big blow to me and I felt miserable to the extend of loosing sleep and weight. Fortunately, it did not take me very long to realise that those who hate, hurt the most and it is not worth hurting for people who bite the hand that feeds. I have forgiven them for the sake of my own happiness but I will not want to have anything to do with them. Yes I am a "Chicken", I do not want to give them a chance to hurt me again. LOL!

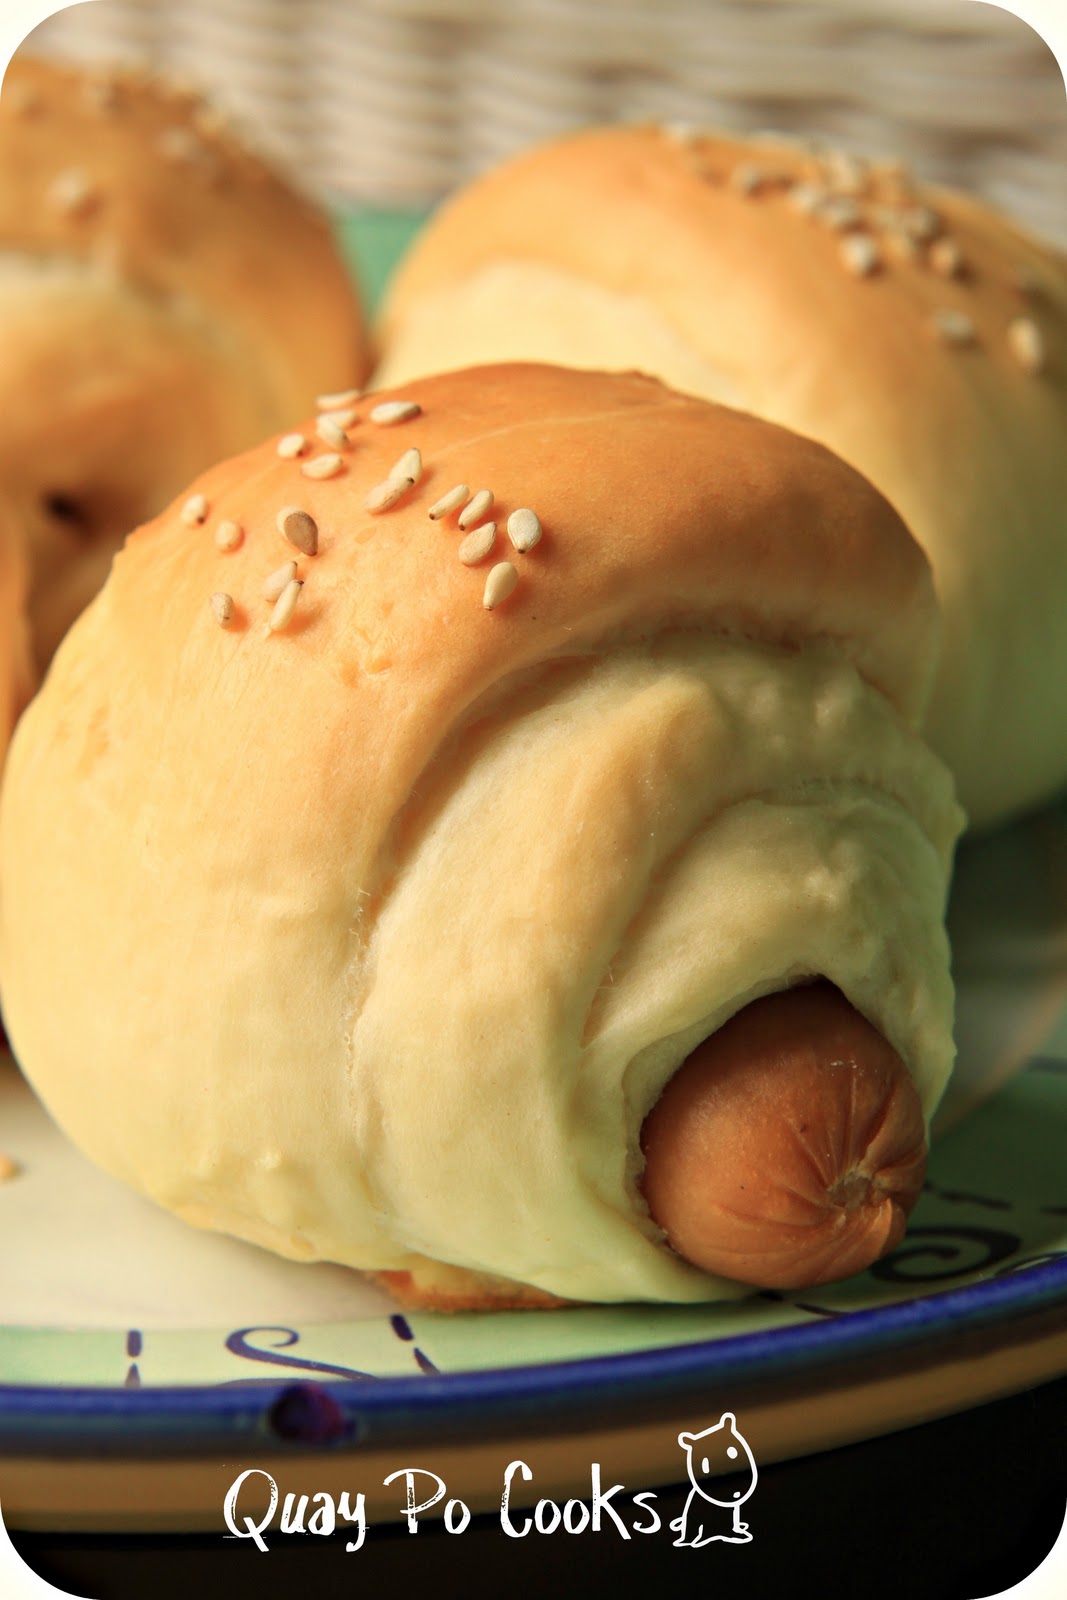
While writing this post, my buns were in the baking and the wonderful aroma of the buns wafted up my nostrils and makes me hungry.  I am very curious to see the outcome because this is the first time I am using the water roux dough method. The recipe I used for this sausage sweet soft buns is the one Sonia of Nasi Lemak Lover used to make her cranberry cream cheese soft bun.  She adapted the recipe from the Magic Bread cookbook by Alex Goh and I adapted the recipe from her. What I like about this recipe is that there is no bread emulsifier used like the one I used before. Both recipes yielded delicious soft buns and the only difference is the buns from this recipe did not stay soft the next day as compared to the old recipe I used. Those buns stayed soft for the next two days. I guess that the use of emulsifier had to do something with that. Since emulsifier reacts with proteins to make a smooth easy-rising dough and acts on starch to make the buns softer, maybe it is also the reason that the buns stayed softer for a longer period. Please correct me if I am wrong.

Cocktail sausage sweet soft bun
Adapted from Magic Bread Cookbook by Alex Goh
Used by Sonia of Nasi Lemak Lover


Gelatinised dough
Ingredient:
100g bread flour
70g hot boiling water

Method:
Place flour in a mixing bowl. Add hot boiling water and mix with wooden spoon to form a rough dough. Cover bowl with cling film and leave dough to cool in the fridge for at least 12 hours, and up to 48 hours.

Basic sweet bread dough
Ingredients:
300g bread flour
100g plain flour
80g sugar
20g milk powder
1 tbsp instant yeast
½ tsp salt
175g cold water
1 cold grade A egg
60g cold butter, cubed
Other ingredients:
18 cocktail sausages (meat of your choice)
1 tbs sesame seeds
1 egg and 100ml water (for egg wash)


Method:
Combine flours, sugar, milk powder, yeast and salt together in a mixing bowl. Tear the gelatinized dough into pieces and add to the bowl along with the egg. Mix on low speed in with stand up electric mixer and add the water into the dough gradually. Mix until dough is well combined and leave the sides of bowl. Add in the cold butter cubes and mix on high speed until dough is smooth. Do the window test and if it does not tear, it is time to shape dough into a ball. Leave dough to proof for 40mins or until double in size. In the meantime, prepare egg wash and sesame seeds to be ready for use. When dough is double in size, punch it down and roll with a rolling pin to get rid of all air bubble. Roll doll up and then divide it into 18 pcs of 50gms per piece. Smooth each piece of dough with you hands in a clockwise circular motion into a small ball until you get 18 small balls of dough. Start from the first smoothed ball and roll the dough out into a thin strip and then use your rolling pin to roll it flat. Place a piece of sausage on the dough and roll it up and seal the end. Paint all the sausage roll with egg wash and sprinkle sesame seeds on top. Bake in the preheated 160C or 320F oven at the lowest rack for 20  minutes.


Note: I find that 50gms of dough maybe a too much to wrap the small cocktail sausage. I suggest that you reduce it to 40gms per ball of dough.


Sunday, November 27, 2011

Eating GOLD!

I have heard of parsnip but I have not seen one before. While I was shopping at the supermarket a few days ago, I came across these white carrots and they were labelled as parsnips. What came across my mind at that moment was, “Aiyoh! why so EXPENSIVE?, all these Quay Lo food stuff here are like eating GOLD!” The price is so outrageous and you don't want to know it. Usually, when something that expensive, I am able to pass and walk away. That time, it was kind of a situation of curiosity killed the cat. I grabbed one and put into my cart and did not even know what I was going to do with it. All I knew was I wanted to find out how parsnip taste like.

When I arrived home, I quickly googled on parsnip recipes and I got one on cupcakes.  Since I have all the other ingredients on hand and I wanted to submit one more cupcake entry to The Aspiring Bakers, I started baking straight away! 

Parsnips resemble carrots except that it is white. 


When I tasted some grated parsnip before I added them to the batter. It was more sweeter and more fragrant than carrots. What I found out was, when they are cooked, they have a buttery and slightly spicy sweet flavor that reminds you of butterscotch, honey, and subtle cardamom.  When the cupcakes were baked, I quickly tasted one before frosting but I am not sure if I get the all the flavors mentioned earlier. What a big disappointment! To me, the texture of the cake was not much different from the carrot cake.  It was rich and spicy and since I have cut down the amount of sugar and frosted the cake with lemon cream cheese, it was not too sweet and I like it that way. The only difference between this cake and my carrot cake was the addition of chopped apple and toasted pecan. The two ingredients gave some crunch and the pecan added nutty flavor to the cake.  Perhaps the next time I make this cake again, I will increase the amount of parsnip to 1 ¼ cup packed so as to get a more distinctive flavor of the parsnip.  To enhance the appearance of the small cupcakes, I added a thin slice of candied ginger to the frosting. For the medium size cupcakes, I sprinkle some orange color sugar and topped with a yellow sugared flower. They actually turned out quite lovely aren't they? 

Parsnip Apple Pecan Cupcake
Adapted from The Café Sucre Farine with modification


Make:
12 small cupcakes
12 medium cupcakes

Ingredients:
4 oz. butter
¾ cup white sugar
1 cup packed brown sugar
4 eggs
¾ cup vegetable oil
2 teaspoon vanilla extract
3 cups all-purpose flour
2 teaspoons baking powder
1 teaspoon baking soda
2 teaspoon ground cinnamon
¼ teaspoon ground cloves
¼ teaspoon nutmeg
¼ teaspoon ginger
½ teaspoon salt
1 cup grated parsnips, packed
1 ¼ cups peeled, diced apple, packed
1 cup toasted chopped pecans

Method:
Preheat oven to 350˚F. In a large mixing bowl, cream butter and sugars with electric mixer. Slowly add oil and mix well. Add eggs, one at a time, beating well after each addition. Add vanilla extract. Combine dry ingredients; gradually add to wet mixture. Stir in parsnips, apples and pecans. Pour into cupcake liners, bake 20 minutes or until a toothpick inserted near the center comes out clean. Let cake be completely cool before frosting. Let you imagination runs wild. Add your own decos and colors to the frosting for better visual effects.


Note: squeeze out some of the juice of the parsnip before adding to the batter.

Lemon cream Cheese frosting
Ingredients:
8 oz cream cheese, room temperature
1/c cup sour cream
½ cup icing sugar, sifted
1 tsp lemon juice
Zest from 1 whole lemon

Method:
Beat cream cheese till smooth, add sour cream and mixed well. Add icing sugar, 1 teaspoon at a time. Add lemon juice and zest, mix well.


Note: I am submitting this cupcake recipe to Aspiring Bakers #13: Enjoy Cupcakes! (November 2011) which hosted by Min of Min's Blog

Wednesday, November 23, 2011

What can you give someone who has everything?

This post is long overdue. It is about a birthday celebration in July this year for a very dear friend of mine, Seok Eng. She is blessed with a good heart and a beautiful family. She is a loving wife, a great mum and grandma and a successful business woman. Although the distance separates us, we are thinking of each other always. For the past few years, we I have never miss going to Singapore to celebrate her birthday with her. If possible, I would love to be there every year. So, what birthday gifts can you give someone  who has everything? Only one thing, I guess.  Our PRESENCE not presents.  It was a great pleasure for us to be able to host a wonderful pre-birthday dinner for her. We went to the il ceilo (The Sky in Italian) at Hilton Singapore. It was an excellent choice of hers. The ambience was lovely and the interior decoration was elegant. The service was 5 stars and the food was luscious! We enjoyed the ambience, the food and most of all our time together. Whenever we are together, there were not once that I was not stuffed with good food and had a good time. 


If you want to know more about this restaurant, here is a link to go read more about it.  There are more beautiful photos of the il ceilo and food they serve, there.

On her actual birthday, we had an exotic Chinese dinner at Xi Yan. That was my second time there. Seok Eng introduced me to Xi Yan when they first started and I believed this had become one of her favorite Chinese restaurant. We arrived before her and while waiting, we took some photos.


The table setting

The arts on the wall

One for the album, don't be mistaken, Quay Po was not the birthday girl.

If you are not convinced by what I told you about Xi Yan, then, I recommend that you read the review by Ho Chiak. You can find photos of most of the dishes we had that evening here. Perhaps after that, you might want to check the place out the next time you are in Singapore.

The evening ended with everyone embracing a fond memory of a perfect birthday celebration for a wonderful person.


A lovely birthday cake and...

some longevity pau for dessert

I am looking forward to celebrate many more birthdays with Seok Eng. I feel extremely blessed to have a good friend like her. 

Maybe the next birthday, I can cook a meal for her?  I was very impressed with the food served at Xi Yan and their presentation was fabulous so I bought their cookbook. I have gone through cookbook and tried a second recipe in there. I made the drunken chicken with dried sour plums and liked it very much. I liked the sweet and sour flavor that was infused into the drunken chicken meat. I would love to cook this for Seok Eng on her next birthday. 


There are so many wonderful dishes in this cookbook and I am pleased to own a signed copy. 


I have shared the Chilled Green House Tomatoes in Wasabi Sesame Sauce with you before and it was from this cookbook too. If you have missed that post and want to try it, just click on the photo to get the recipe.


Here is the second recipe that I tried and I will definitely share with you each time I try a new recipe from there because most of the dishes in there are quite simple to do but the taste is not simple, at least those that I have tried were unique and delicious. I think it is worth sharing. This photo is not well taken so it does not do justice to the dish. I got the light setting wrong. When I realise my mistake (yet another one) it was too late, we eat all the chicken and only the sour plums were left!! LOL! 

Drunken Chichen with Dried Sour Plums
Adapted from Xi Yan Cuisine with modification


Ingredients:
1 fresh chicken (1.2 kg approx.)
3 stalks spring onion
8 slices ginger
2 stalks Chinese parsley

Marinade:
30 dried plums (120gms)
1 tbs wolfberries
2 tbs salt
2 cups Shaoxing wine
3 cups soup from cooking chicken
1 tsp crushed rock sugar

Method:
Cut chicken and rinse. Bring 7 cups of water to boil. Add chicken, spring onion, ginger slices, wolfberries and Chinese parsley. Lower heat to medium and cook for 25 to 30 minutes.  Drain Chicken and soak in iced water till cool. Drain again.  In a mixing bowl, add dried sour plums, rock sugar and salt.  Sieve soup from cooking chicken and skim off the oil. Pour into the bowl while still hot. Cover with lid and let dried sour plums soaked till flavour is fully infused in the soup. Leave it to cool.  Add 2 cups of Shaoxing wine and mix well.  Soak chicken in the marinade and leave it overnight. Chop into pieces. Place chicken in the serving bowl. Garnish with the dried sour plums and wolfberries. Serve with the marinade as the sauce over it at room temperature. 

Monday, November 21, 2011

I DO! DO!!

So when my plum cupcakes were baked, I took a bite to taste before frosting them. Yik!!  It was so saltish!! I thought there was something wrong with my taste bud. I asked my mum to taste it and she asked me what kind of cup cake was that. I think she was being kind not to tell me that it tasted horrible!  Then I asked my Quay Lo to taste. He shooked his head and said "This does not taste right Honey".  I was so puzzled and wondered what went wrong. I went back to read the recipe carefully and there I found the mistake I made. It called for ¼ tsp salt not 1!! I think it is time to go check my eyes. Aiyoh, this time, I really can’t think of a way how to salvage them. I have to toss away all the cupcakes and redo another batch. SOB! SOB! I really hated it when I had to throw away food. 

So are you ready to hear the verdict of my second batch? I love that this cake turned out moist and the slices of plums in them gave a little crunch and a slightly sour taste to it. The red skin of the plum also enhanced the look of the cupcakes. They are not too sweet and had a little smokey flavor from the smoked paprika I added.  Oh I can read your mind, you must be thinking “Is this Quay Po gone nuts? Adding paprika to a cake batter?” Am I right or not?  I don’t blame you because I did not know what to expect too at the time when I sprinkled the paprika onto the batter. But then, like the saying goes, no venture no gain. What’s the worst that could happen? To tell you the truth, that was a good add. It not only added color to the cupcakes but it gave a little zing to the taste and the flavor was complex but very pleasing to the palette. The combo with roasted chestnut butter cream frosting was a perfect match. My mum does not take butter or cream so she ate it without and she said it tasted fantastic this time. As for me, I love it even more with the frosting. So will I make this cupcake again? What did I say when I took my marriage vows twice?  I said, “ I DO, I DO!!” 

You must be curious to know where I got those beautiful and elegant cupcakes paper liners from. They flew here all the way from USA. My step daughter, Erin bought them for me. Erin, your selection was superb and thank you for shipping them to me. I wish you are here to taste these delicious cupcakes.


Plum Cupcake with Butter chestnut frosting
Adapted from Dorie Greenspan’s recipe with modification


Makes 10 medium size cupcakes

Ingredients:
1 1/2 C all-purpose flour
2 t baking powder
1/4 t salt
1/4 tsp ground cardamom
smoked paprika for to sprinkle
5 tbs unsalted butter
3/4 C packed light brown sugar
2 large eggs
1/3 C vegetable oil
Grated zest of one lemon
1 1/2 tsp pure vanilla extract
2 big plums, pitted and sliced

Method:
Combine the flour, baking powder, salt and ground cardamom. Cream the butter with the brown sugar.
Add the eggs, one at a time, beating well after each addition.
Beat in the oil, lemon zest and vanilla. Reduce the speed and add the flour mixture. Fill the cupcake liners 3/4 full and place some cut slices of plum on each one. Sprinkle with smoked paprika. Bake for about 20 minutes or until they bounce back when touched lightly. Let cool for at least 15 minutes before frosting. This cake taste good without frosting too.

Butter chestnut frosting
Click o the pic to get the recipe. Note: rum is optional


ENJOY and have a Wonderful week ahead of you!
Hugs to all!


Note: I am submitting this cupcake recipe to Aspiring Bakers #13: Enjoy Cupcakes! (November 2011) which hosted by Min of Min's Blog

Friday, November 18, 2011

Angry Birds cupcake class

Earlier this week I had the pleasure of attending a class about making cupcakes, and using fondant to decorate the cakes with "angry bird" figures. Before I tell you more about it, I would like to thank Shyamala for the invitation to the Angry bird cupcake class. 


The instructor started the class by introducing fondant and its characteristics to us. She then went on to show us step by step how to make 2D and 3D figurines. After that she asked us to make the angry birds and a "piggie" on our own as she assisted us whenever necessary.


Step by step instruction by Nancy of Cake Connection


Her instruction was clear and precise. During her demonstration she had also cautioned us to pay attention to details when we work with fondant in order to get impressive figurines. I like that she also shared with us tips that we might never get if we just  followed instructions from a book. 

After spending a few hours working with the fondant to make the angry bird figurines, I now understand why these cupcakes sell at a high price.  So now, take a look at my Angry bird cupcakes and tell me if I have WOWED you.


2D angry bird

Brown bird (the eyebrow broke due to handling)

Yellow bird

My favorite Red bird


Cute green Piggy

Ta da!! My masterpieces at a glance

For those of you who would like to try making these angry bird figurines for your cupcakes, here are some of the tools you need.


A small paring.
A pizza cutter
A smooth, clean surface.  
A small rolling pin.
Plastic wrap or bags, to keep the extra bits of fondant from drying out while not in use.
A small paintbrush.
A small offset spatula, or other thin-bladed spatula
Round cutters and flower petal cutters


The ingredients you need to do the figurines:
Fondant
CMC powder
Flavoring essence
Food coloring, preferably gel or paste.
Powdered sugar to keep the fondant from sticking to everything.
Shortening, to repair small tears and to put on your hands.
Edible glue


Wednesday, November 16, 2011

Quay Po's FIRST Cooking Class

I would never in my wildest dream thought that I will be invited to conduct a cooking class. I would like to thank Tania of Pantry Magic for giving me this opportunity.


Before last July, don't ask me to cook or bake, I was not interested. It is only when I started "Quay Po Cooks" to document my mum's and my Quay Lo's recipes that I began to pay attention to cooking and baking. Oh, and blog? What do I write about that anyone would want to read? I am not even a good writer. How would I know that in the process of seriously learning cooking Chinese cuisine from my mum and Western cuisine from my Quay Lo that it now became a second passion for me? My first is still dancing. What kept this passion for cooking and baking is actually the whole package. It is the result of delicious food,  the nice food photos, the positive comments and support I received from my family, friends, my blogger friends and my readers and the opportunity to meet some great friends all over the globe who share the same passion. I am here because of your continuous encouragement and I have to say “Thank you” again and again to you  for your friendship and being with me on my culinary journey. 

A shout out to those who do not know how to cook or bake but want to and are afraid to. DON'T talk yourself out of your interest!  Go into your kitchen and start now and you will be so happy you did. You will find yourself entering in a new world of self satisfaction. If Quay Po can do it, anyone can! It takes only a little time to start understanding the basics.

I am eager to share with you my experience of conducting my first cooking class in Pantry Magic, Bangsar last Sunday.  The morning before the class, I was rather nervous. I was afraid that I would not be able to deliver a good demontration. To my surprise, it went very well. I was much relieved that the “Lucy” in me was in hiding (wipe forehead with a sigh). If you are a new reader and wonder who “Lucy” is, read this old post of mine).  What is more I had my blogger friend, Sonia of Nasi Lemak Lover there to lend moral support and help me. Finally, I was very fortunate to have extremely friendly, nice people who attended my class.  It was more like a “Sunday hang out” rather than a class. We were chatting and laughing like old friends.  While waiting for the food to be ready, my  new friends were chatting amongst themselves and enjoying the little treat I brought for them. I made some “Maca-rights” the day before and brought with me to the class.. Yes, there were those with my roasted chestnut filling.  


Everyone commented that they were delicious and all noted that they liked them because they were not so sweet. Everybody who has tasted my macs with the roasted chestnut filling (including those who did not like macs due to their normal ultra-sweetness) said they enjoyed this combination. Sonia’s daughter loved it so much, she ate two! Click on the picture if you want the recipe. 


Points made by my attendees that I needed to take note of were what they liked about my class. They liked that I shared with them all the “Dos and Don'ts” and that I highlighted the useful tips on each recipe. They felt by knowing that, they were better equipped to try the three recipes on their own at home with a better chance of success. 

Although I was not familiar with the kitchen tools and the behavior of the oven at Pantry Magic, the food came out perfect and received positive comments from all the attendees.  Come to think of it, it is quite a good deal to attend classes in Pantry Magic. You only have to pay RM150.00 to learn three recipes and you will receive a RM50.00 discount vouchers (valid for 1 year) from them. You get a delicious meal and got to take home some delicious meat loaf, mashed potatoes and chocolate chips cookie dough. Also, you get to meet nice people. Isn't that worth it?

Both Tania of Pantry Magic, and especially the attendees, were very happy with the class and they said they looked forward to another in the near future.  That was so awesome! By the way, if you are somewhere in Bangsar, you might want to pop into Pantry Magic. The shop is a haven for those who love cooking and baking.  Here is the link to their website and you can browse through the products they carry. It is indeed a cool place and there is not one item there I don’t want to own.

One of my attendees, Tina Muhd is a Pilates Instructor. She said I should organize another class on baking and she will teach us how to stretch while waiting for the bakes to be ready so we will not feel so guilty. LOL!  She is so cute.  If any of you who reside in Kuala Lumpur, would like to take private Pilates class with her, you can contact her at her mobile 0162393923 or by email at breathingpilates@gmail.com.  From the short encounter with her, I find her to be a friendly and warm person and fun to be with.  If I were to take up a private class in Pilates, I would definitely go to her.

As I was busy conducting the class, I had no time to take any photos. I'm so grateful to Sonia who took some photos and she has shared her experience at my class and the photos in her blog. Click on "her blog" to go check it out. Here is group photo taken by her after the class. 


Thanks so much for your help Sonia. I so very much appreciate your presence and your help. MUAXXX!!  I am so happy to hear that you enjoyed yourself and it was great to see your daughter enjoying the food so much.  She is living up to the reputation of a Food Blogger Mummy's daughter! LOL! I am looking forward to see your post on the class and all the other photos that you have taken.

Here are the three recipes that I shared in my class last Sunday, which I would like to share with you today. I have posted two of the recipes before but here are the improved versions.  The improved meat loaf recipe was given to me by my Quay Lo but he could not remember where he got it so he could not give credit to the source. He said he had made some modifications to the original recipe. This one is to die for because the meat came out SO flavorful! For the mash potatoes recipe which was adapted from Linda Larsen, I have made further modification to it to get a more even silky and smooth texture. Lastly my late mother-in-law's American chocolate chips cookies, this too, I have changed the portion of white and brown sugar and the oven temperature to yield an even more chewy texture.


Pardon me for using the old photos for the recipes because I did not take any during the class.

Classic Meat Loaf


Ingredients:
1.5 kg ground beef
4 tbsp vegetable oil
2 onions chopped
6 cloves garlic minced
1 green pepper finely chopped
4 stalks celery chopped
3 eggs beaten
120 ml cream
150 g soft breadcrumbs
4 tbsp ketchup
2 tbsp brown sauce
1 tbsp chilli sauce
1 tbsp paprika (preferably smoked paprika)
2 tsp salt
½ tbsp ground black pepper

Method:
Preheat the oven to 180C or 375F, or gas mark 4. Heat the frying pan and add the oil. Put in the onions and let them cook for a few minutes, stirring occasionally. Add the celery, the green pepper and the garlic. Stir it all together and cook until soft. Then remove from the heat. Transfer the softened vegetables onto a tray and allow to cool for a few minutes. Place the beef into a large bow and add the ketchup, the HP sauce, the chilli sauce, the beaten eggs, the cream, the breadcrumbs, the paprika, the salt and pepper. Use your hands to combine it all together, squeeze and fold to ensure that everything is thoroughly mixed. Then add the cooled vegetables and mix them in thoroughly as well. Take handfuls of the meat mixture and press them down into the loaf tin. Continue to fill the tin until all the meat is used. Finish off by molding the top into a loaf shape. Place the meat loaf into the centre of the preheated oven and cook for approximately 1hr – 1hr 15mins. After this time, remove it from the oven. Allow it to rest for at least 15-20 minutes before cutting. Once the meat loaf has been removed from the tin, place it on a cutting board and cut into thick slices, using a large knife. It can be served with mashed potato, accompanied by horseradish sauce, mayonnaise, mustard or your favorite brown or cream sauce.

Mashed Potatoes


Ingredients:
2 lbs of russet potatoes
1 tbs salt (to put into the water)
85 gm unsalted butter
1 C warm milk
salt and freshly ground black or white pepper, to taste

Method:
Place the potatoes in cold water. Bring water to boil on medium heat. Lower heat to low and let simmer and cook potatoes until fork tender or about 25 to 30 mins. Drain potatoes and return to the same pot and let the residual heat in the pot to dry out the potatoes. Transfer to the mixing bowl. Melt the butter in a sauce pan with 1 cup of milk. Add the butter and milk potatoes in mixing bowl and mash them with a masher, potato riser or electric mixer. Add salt and freshly ground black or white pepper to taste.
Useful tips:
1)  Start with cold water to allow for more even cooking.
2) NEVER use a food processor to mash potatoes. 
  While it  seems like a good idea to make short work of the job, the extremely high speed at which the blade spins literally smashes the starch granules, and what you end up with is a gluey, starchy, nasty mess.
3) If you want lighter mashed potatoes, whisk them or use a mixer. If you like dense, smooth mashed potatoes, use the ricer. The texture of your mashed potatoes are really all about the tool you choose to use.

American Chocolate chips cookies


Ingredients:
2 eggs
2 sticks (8 oz.) butter soften
1/3 C granulated sugar
1 tsp vanilla extract
2 C semi-sweet chocolate chips

(A)
2 ¼ C all purpose flour
1 tsp baking soda
1 tsp salt

(B)
1 C packed brown sugar
½ C oatmeal (raw)
2 tbs corn flour

Method:
Put (A) in a bowl and mix well and set aside. Put (B) in a blender and blend till fine. Beat fine blended mixture (B), butter, granulated sugar and vanilla extract in a large bowl with the mixer until creamy. Add eggs and beat well. Gradually add mixture (A) mix well. Stir in chocolate chips and mix well. Wrap the dough in cling wrap and chill in the freezer for 1 hour. Just before baking, preheat oven to 160C or 320F. Cut dough and form into golf ball size and place onto ungreased cookie sheet and bake for 18 - 20 mins or until lightly browned. (Note: this depends on your oven, mine was perfect at 18 mins)  Cool slightly and remove cookies to wire rack to cool completely before taking out of the baking sheet.


Note: Keep cookies in an air tight container and store in the fridge for balance not eaten. It becomes more chewy the next day.